Setup code on Android
If you don't use the demo provided by Icare don't forget to check the next steps.
3.1 Add java files
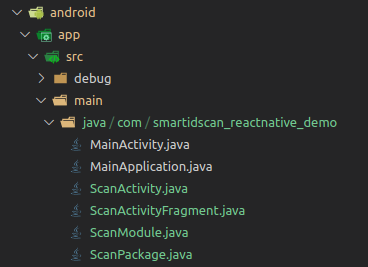
Take the java files (in /doc/files/android/java) and put them in android/app/src/main/java/com/yourcompany/foo
(in the same path that MainActivity.java)

3.2 Update package names
And then update in each file the package name with the package name of your project.
For example:
We replace in each 4 files the line :
package INSERT_PACKAGE_NAME;
with
package com.smartidscan_reactnative_demo;
3.3 Add res files
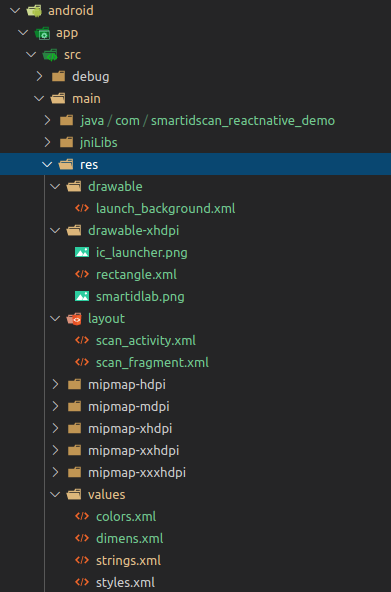
Take the res files and folders (in /doc/files/android/res) and put them in android/app/src/main/res.
WARNING : Maybe some files or folders already exist, then you complete your existings one with the content of files.

3.4 Update package names
And then update
- scan_activity.xml
- scan_fragment.xml
with the package name of your project.
Search all INSERT_PACKAGE_NAME and replace with your package name (e.g. with com.smartidscan_reactnative_demo)
3.5 Add package to MainApplication
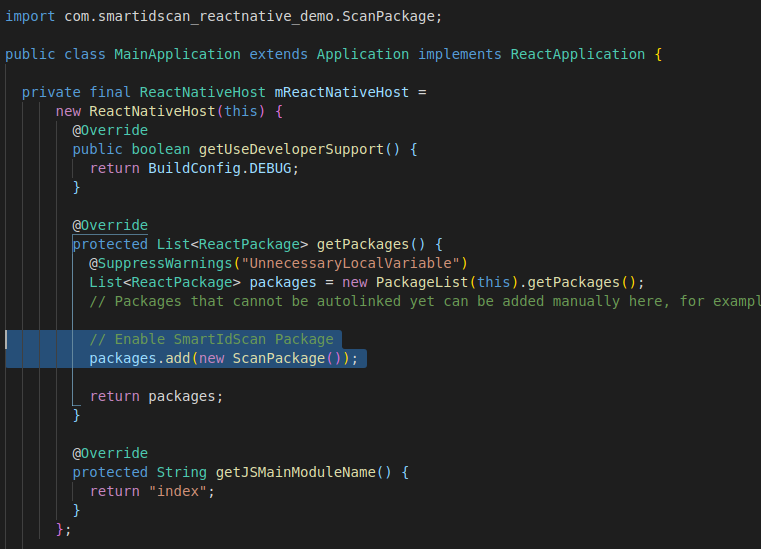
In the MainApplication, import the package :
import INSERT_PACKAGE_NAME.ScanPackage;
Be sure to replace INSERT_PACKAGE_NAME with your package name
import com.smartidscan_reactnative_demo.ScanPackage;
And add the code to import the package, in getPackages function :
// Enable SmartIdScan Package
packages.add(new ScanPackage());
See an example :

3.6 Build android
Let's check if the app build.
If all the previous tasks were completed in the right way, the build should pass.
To do so, launch : `
./android/gradlew
3.7 Troubleshoot
If you can't build the app, maybe you must create a file that's define where is the Sdk.
In /android folder, create local.properties containing the path to your android SDK :
sdk.dir = /home/icare/Android/Sdk